Lighting and rendering
Lights use physical units, a camera exposure turns scene light into the picture, reflection probes and probe volumes give rooms their own reflections and indirect light, and a quality preset decides anti-aliasing, ambient occlusion and other costs.
Light units
One scene light unit is 1000 photometric units, so everyday values stay small numbers.
| Light | Intensity means | Typical values |
|---|---|---|
| Directional Light | illuminance in kilolux | overcast 1 - 2, sunlight 50 - 100 |
| Point and Spot Light | luminous intensity in kilocandela | 60 W bulb 0.07, flood light 2 - 10 |
| Environment map, emissive materials | luminance in kilonit | clear sky 2 - 8 |
Point and spot lights fall off with the inverse square of the distance (Inverse Square Falloff) and fade to zero at their Range. Lights from older scenes keep their old falloff until you switch it on.
Exposure
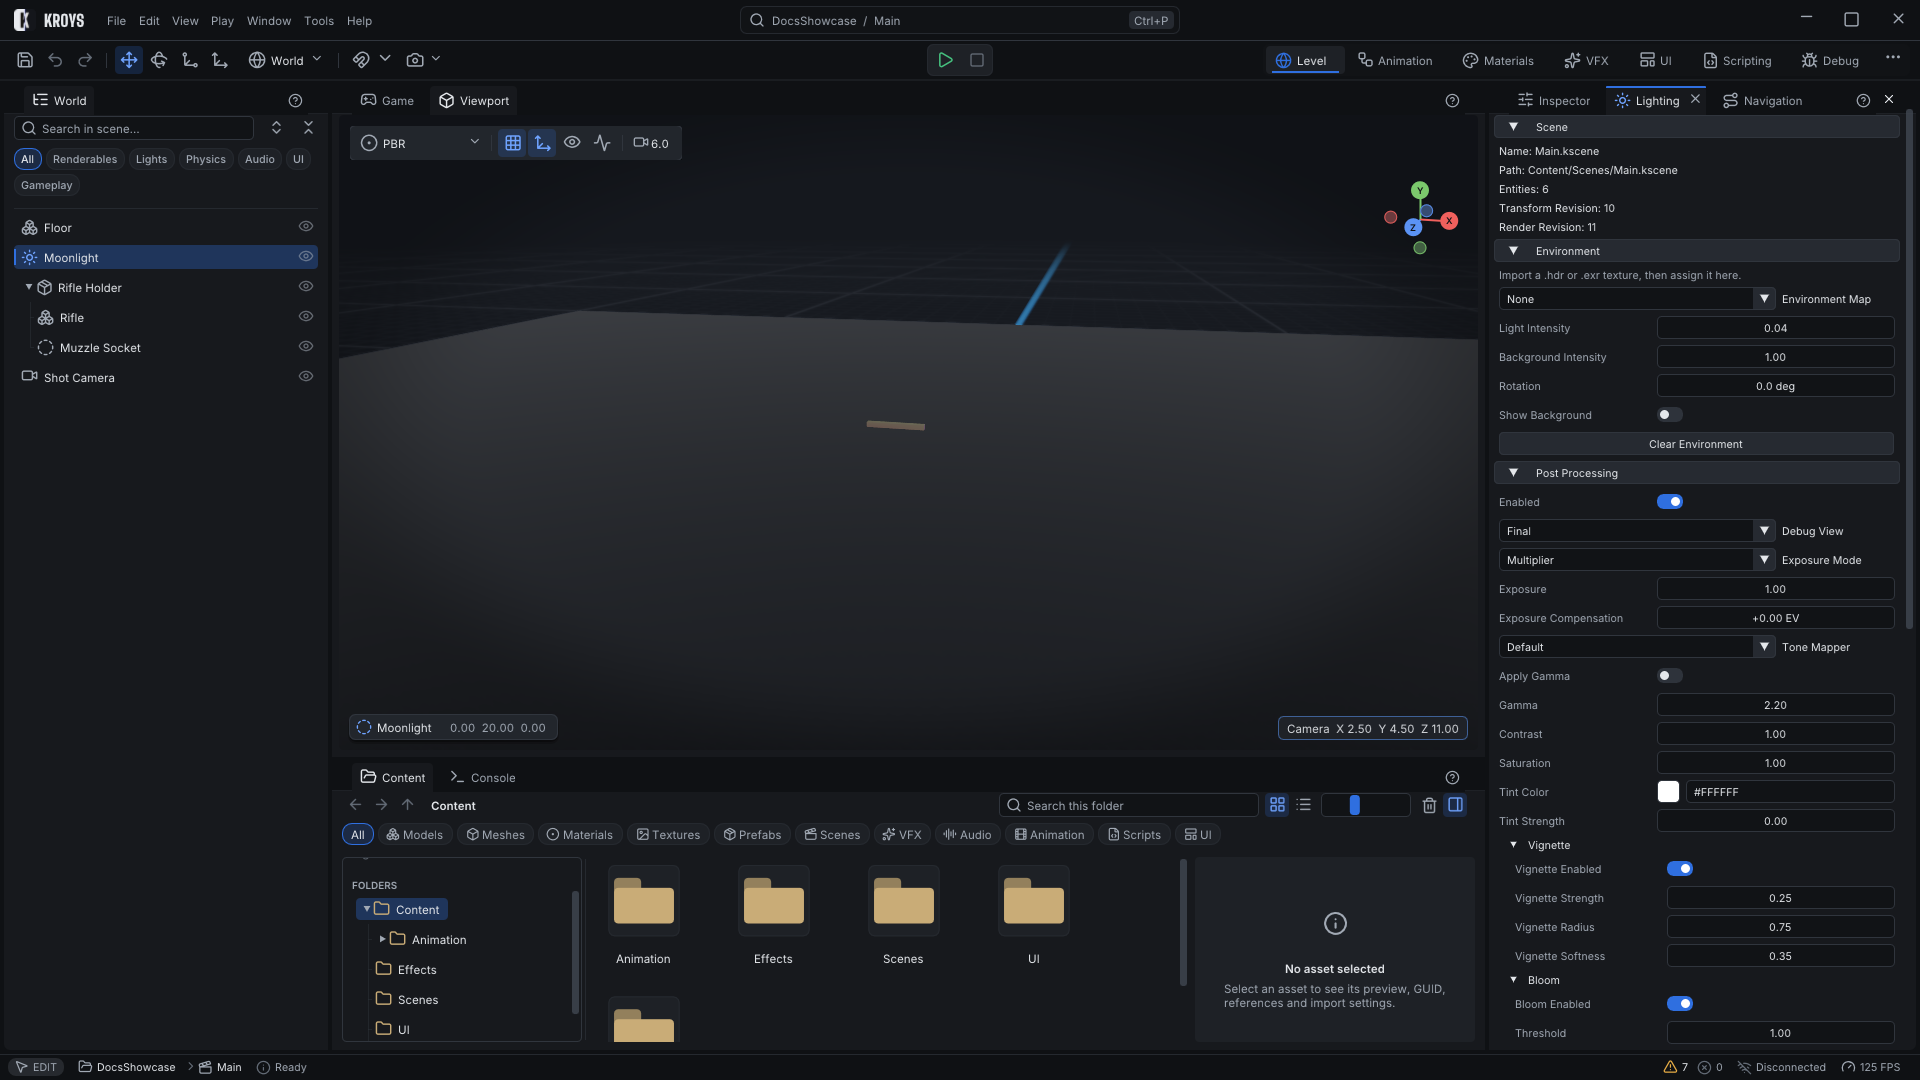
Lighting > Post Processing > Exposure Mode decides how bright the scene looks:
- Multiplier: the scene light times Exposure (older scenes).
- Manual EV100: a camera exposure value. Sunny day about 15, overcast 12, interiors 7 - 9.
- Auto: measures the picture every frame and adapts within Auto Exposure Min/Max EV100 at the Speed Up and Speed Down rates.
Exposure Compensation brightens (+1 doubles) or darkens in every mode. Tone Mapper ACES Filmic is the recommended curve for new content: bright saturated colours roll off towards white instead of clipping.
Reflection probes
Outdoors, shiny surfaces reflect the sky. Indoors that looks wrong: a polished floor should reflect the room. A Reflection Probe captures its surroundings and replaces the sky's reflections and ambient light for everything inside its box.
- Add an entity in the middle of the room and give it a Reflection Probe component (Lighting). Place it where an observer would stand; the capture is taken from the entity's origin.
- Set Box Extents (half size) and Box Offset so the box matches the room's walls. The box follows the entity's rotation and scale.
- Click Bake in the inspector, or Bake All Reflection Probes (also in the command palette). A Bake task in the Tasks panel shows the progress. The capture is saved in
Content/Lighting/ReflectionProbesand ships with the game; baking is one undo step.
| Setting | Effect |
|---|---|
| Blend Distance | Fades the probe out over this band inside the box faces, for soft transitions between rooms and to the sky. |
| Priority | Where boxes overlap the higher priority wins; at equal priority the smaller box wins. |
| Parallax Correction | Projects reflections onto the box, so a box-shaped room's reflections line up with its walls. Turn it off for open areas. |
| Intensity | Scales the captured light. |
| Capture On Start | The running game captures the probe again when it starts (scenes that change before play). |
A running game also captures, once, every enabled probe that was never baked. Scripts and tools can set Capture Requested to capture a probe again; capturing pauses the GPU briefly once per face, so do it during loading. Probes do not see water surfaces, and up to eight probes shade any one view.
Scripts can ask for a new capture too: ReflectionProbe.SetBakeRequested(true) on the probe's entity (C#), which the running game picks up on the next frame.
Probe volumes
A reflection probe gives a whole room one ambient light. A Probe Volume gives it light that changes across the room: brighter near a sunlit window, darker under a table, coloured by a red wall. It holds a grid of small light probes over a box; surfaces inside the box take their indirect diffuse light from the nearest probes instead of the sky.
- Add an entity and give it a Probe Volume component (Lighting). Set Box Extents and Box Offset so the box covers the area, floor and walls included (surfaces outside the box are not lit by it; the probes themselves sit at cell centres, inside the box).
- Choose the grid with Probes X/Y/Z: about one probe per metre is a good start (the inspector shows the total).
- Click Bake (or Bake All Probe Volumes, also in the command palette). A Bake task renders six small views at each probe and shows the progress per probe. The result is saved in
Content/Lighting/ProbeVolumes, ships with the game, and baking is one undo step.
| Setting | Effect |
|---|---|
| Blend Distance | Fades the volume out over this band inside the box faces, into the sky or a neighbouring volume. |
| Normal Bias | Moves the lookup along the surface normal (in cells) so surfaces do not darken themselves. |
| Intensity | Scales the baked light. |
| Priority | Where volumes overlap the higher priority wins; at equal priority the smaller box wins. |
Rebake after moving walls or lights. Without a bake, and outside every box, surfaces use the sky and reflection probes as before. Probes see one bounce of light; keep probes out of walls (they would see black), and remember thin walls between probes can let light through. Up to four volumes shade a view. Scripts can set ProbeVolume.SetBakeRequested(true) to bake one for the running game.
Ambient occlusion
Corners, creases and the ground under objects receive less sky light. Screen-space ambient occlusion finds them every frame from the depth of the picture and darkens the indirect light there (sky, reflection probes, probe volumes), never direct light from lamps or the sun.
Lighting > Post Processing > Ambient Occlusion: AO Radius is how far (in metres) a surface looks for occluders, AO Intensity how strongly they darken. The quality preset decides the resolution and how many samples are taken; Low turns it off.
Anti-aliasing
The quality preset chooses the anti-aliasing:
- TAA (Medium, High, Ultra): every frame is rendered with a slightly shifted camera and blended with the previous frames, which smooths edges and fine detail. Particles, effects and glass tell it to use the current frame, so they never smear; the game's UI is drawn afterwards and stays sharp. It restarts after camera cuts and resizes.
- FXAA (Low): a single-frame edge filter on the final image, cheaper and softer.
Post-processing
Lighting > Post Processing holds the camera and the look of the picture, applied in this order:
| Group | What it does |
|---|---|
| Exposure | See Exposure. |
| Bloom | Light brighter than Threshold (scene units, before exposure) glows; Soft Knee softens the threshold (0 - 1), Intensity scales the glow, Radius widens it, Iterations sets how far it spreads. Off on Low quality. |
| Tone Mapper | Maps scene light to the display; ACES Filmic is recommended. |
| Atmospheric Fog | Distance and height fog, optionally lit by the sun. |
| Contrast, Saturation, Tint | Colour grading of the final picture. |
| Vignette | Darkens the corners. |
| Ambient Occlusion | See Ambient occlusion. |
Debug View shows the scene before grading (Raw Scene Color) or its depth.
Quality presets
One preset sets the rendering costs of the whole game: Low, Medium, High (default) or Ultra.
| Low | Medium | High | Ultra | |
|---|---|---|---|---|
| Anti-aliasing | FXAA | TAA | TAA | TAA |
| Ambient occlusion | off | half resolution | half resolution, more samples | full resolution |
| Shadow map size (at most) | 1024 | 2048 | 4096 | 4096 |
| Sun shadow cascades (at most) | 2 | 3 | 4 | 4 |
| Bloom | off | on | on | on |
- The game's default: Project Settings > Runtime > Quality Preset. New projects start on High.
- Your editor: Preferences > Game Preview > Rendering Quality overrides it on this machine only.
- Players: start the game with
--quality Low(or Medium, High, Ultra), or put a linequality_preset=Mediumingraphics.cfgin the game's user settings folder (Games/<project name>).
KroysEngine 0.1.0 documentation, built from the engine repository by Tools/BuildDocsSite.py.